How to easily videostream with Panasonic Industry’s new ESP32-S2 based PAN9520 Wi-Fi module. A step by step instruction.
Admittedly, Wi-Fi technology is not the latest thing – but it’s still state of the art when it comes to processing higher data rates, especially in personal area networks.
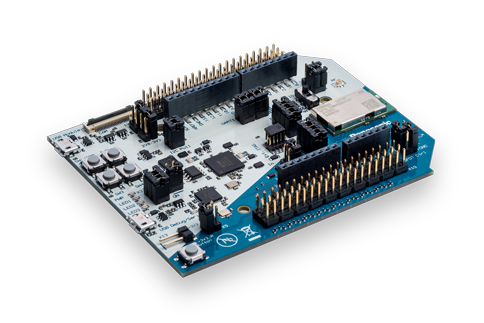
Now, Panasonic Industry is breaking new ground with its new PAN9520 wireless module. Containing the ESP32-S2 chip, it can be considered as the first Espressif-based module that enables standalone Wi-Fi applications. The PAN9520 is part of a new generation of Panasonic Industry’s evolution boards coming with the Arduino form factor, serving the trend for mass-market available shields with the mere purpose of rapid prototyping. Surveillance cameras, for instance, still are a domain of Wi-Fi networks, so let’s look exemplarily at the Arduino PAN9520 evaluation board and its interaction with the OV2640 camera – from the required hardware and toolchain to finally running the demo. So join us for this step by step instruction:
Some specs at first
|
Chip |
ESP32-S2 |
|---|---|
|
Performance |
Up to 240 MHz |
|
Technology |
2.4 GHz Wi-Fi 802.11 b/g/n |
|
Memory (internal) |
128kB ROM, 320kB SRAM, 16kB low power SRAM |
|
Memory (additional external ) |
4MB Flash, 2MB PSRAM or MB Flash, 0MB PSRAM |
|
Security features |
WPA2 and WPA3 personal |
Required Hardware
The Panasonic Industry PAN9520 is a 2.4 GHz 802.11 b/g/n embedded Wi‑Fi module based on Espressif ESP32-S2 that includes the powerful Xtensa® 32-bit LX7 CPU.
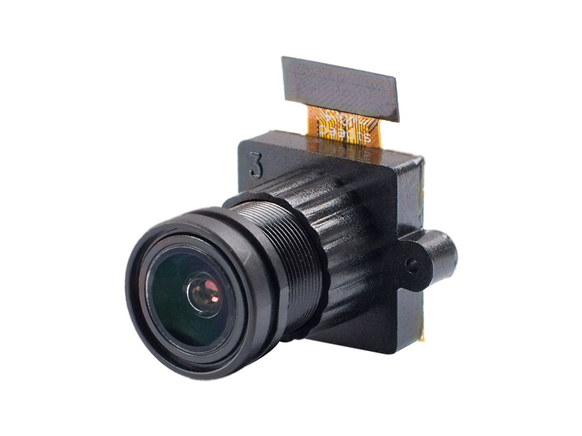
OV2640 Camera Module with flexible PCB connector
Installing Toolchain
The project has been developed in Visual Studio Code (VS Code). Thanks to its cross-platform compatibility, the code can be built and adapted on all operating systems.
You are required to take two simple steps:
1. Install Visual Studio Code (here)
2. Install PlatformIO Extension over the VS-Code extension menu and wait for the installation to finish, this might take a while.
3. Restart Visual Studio Code and clone the project either by typing in the Terminal:
git clone –recursive https://github.com/panasonic-industry-europe/pan9520-etu-camera-stream-…
Or by going directly to the GitHub repository https://github.com/panasonic-industry-europe/pan9520-etu-camera-stream-web-server.git and download the Code directly from there.
4. Go to "File" -> "Open Folder" and select the project folder containing this application. Wait for all the dependencies to be downloaded and installed automatically.
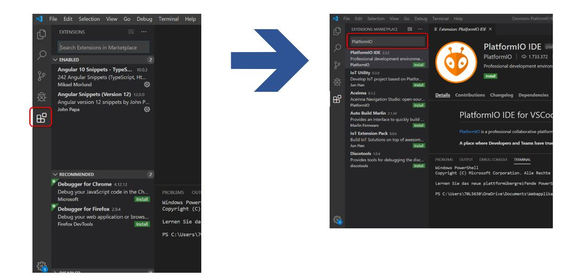
Editing the Code
Basically, the code works out of the box. However, it is important to know where to change the settings for the softAP, e.g. to change the password or the SSID.
main.c
In the main.c file, the initialize_cam function is used to configure and initialize the hardware to ensure that the camera works properly (lines 38-61). These settings were made for the OV2640. In principle, it is possible to connect other cameras if the pinout is similar. In the main function app_main, the previously mentioned initialization of the camera is started alongside the WiFi access point and the webserver.
httpd.c
In the httpd.c file the settings are configured for the webserver. The setup for the webserver is done in the app_httpd_main function, where two URI handlers are being registered: the index_handler for the static Html output and the stream_handler which streams the camera image continuously.
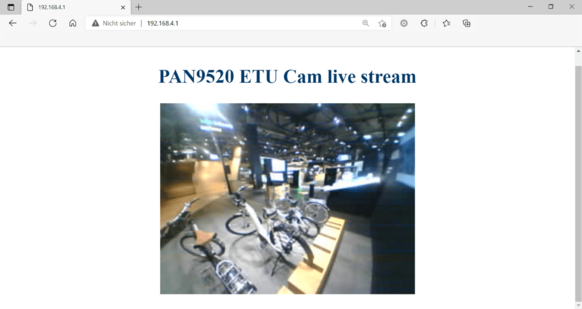
What you end up seeing in the browser is set in the index_handler (line 45-73). A simple static text "PAN9520 ETU Cam live stream" (line 60) alongside the continuous camera stream in a small box below the text (line 61) which is being delivered by the stream_handler (line 76-139). If you analyze the code more closely, it becomes clear that the image is loaded from the framebuffer (line95-100) continuously and sent in fragments so-called chunks (line 101-127). A calculation of the framerate is displayed in the logging (line 128-137).
Wifi.c
The settings of the WiFi connection are made in the wifi.c file. The Access Point configuration like the SSID name or maximum numbers of connections is set in lines 30-34. The event handling for Wifi is handled in the wifi_event_handler function (line 39-58), for the sake of simplicity, this function will not be discussed further in detail. It is only important to know that there are basically two states from the handler's point of view: that of a connected and disconnected client.
The most important settings and initializations of the access point are made in the wifi_init_softap function (line 61-83). The SoftAp is assigned a static IP address (line 66, in this case 192.168.4.1) and a password in line 75. WPA2 is being used as a security certification program (line 78), but it’s also possible to change this. However, this requires changing the security features in menuconfig. (see here)
Get things connected
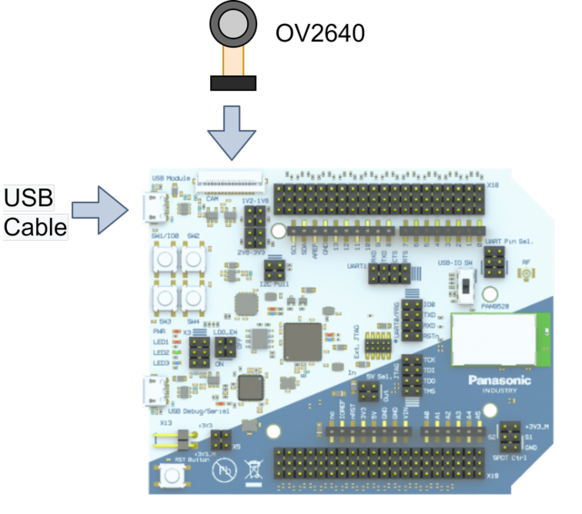
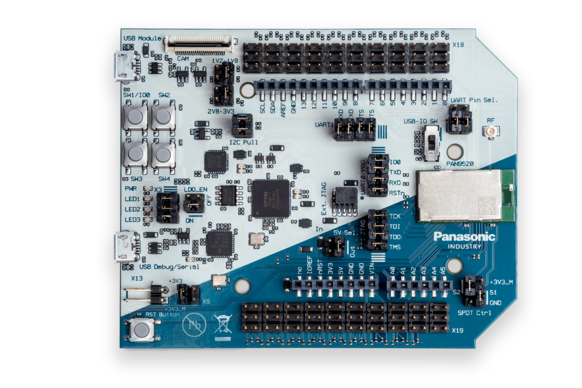
The PAN9520 ETU contains a 24-pin FPC connector for operating a camera module via an 8-bit parallel camera interface and SCCB (Serial Camera Control Bus). Connect the camera like shown in the picture. Please make sure that the lens is turned towards you so that the pinning is the right way round. As soon as the camera and Evaluation Board are connected, plug in a micro USB cable in the “USB Module” Interface.
Flashing and Running the Demo
- Open VS Code
- Click on the project task menu (Alien Head) and choose: esp32-s2-kaluga-1
- Click on General and then Build.
- Press reset while holding pressed down the SW1 Button. This will activate the download mode.
- Click on General and then Upload.
After the upload, you will see an error message in the terminal. This is because the task can’t reset the Board itself. You have to reset the board by pressing the reset button.
- A Wi-Fi Access Point will occur with the SSID you named above
- Connect to that AP with the password you set
- After the connection has been established open a browser and type 192.168.4.1 into the URL field
- Enjoy the livestream!
